Friday, December 28, 2012

Why you need a Wood Stove Thermometer

If you own and use a wood or coal stove, then you should have a wood stove thermometer. The stove thermometer will tell you if your wood stove is operating efficiently at just a glance.

The Rutland stove thermometer is designed so that you can easily see if your stove is burning at a temperature that can cause creosote build up.

Installation instructions for the Rutland Stove thermometer are as follows:
Install thermometer on the vertical single wall pipe of your coal or wood stove.
The recommended placement of the thermometer is not more than 6" above the surface of the stove. However, the thermometer may also be placed on the top surface of the stove.
A safety wire is provided to prevent the unit from dropping if it becomes overheated.
The most efficient burn zone may vary, depending on specific stove or area of stove or pipe surface being measured.
Be sure to consult your stove owner manual for proper burn temperatures as each stove can be different.


Tuesday, December 18, 2012

DIY Pine cone Firestarters

Pine cones make great firestarters, if you aren't up to making your own you can purchase firestarters at http://www.woodstove-outlet.com/fireplace/startmatch.htm.

Items you'll need:
Pine Cones
Fine Candle Wick
Paraffin, Candlewax, or beeswax
Newspaper or wax paper
Cheap pot that you won't use for food after this project, deep straight sided pot is the best.


The first thing you need to do is gather your pine cones. If the pine cones are too dry then they will be brittle and tend to break as you handle them. Pine cones that are too wet need to be allowed to dry for seven to ten days in a weather protected area.

Next wrap the wick around the pinecone tightly being sure to leave a "tail" at the tip of the pinecone so that you can use this as a handle for when you are dipping the cone.

Melt down your paraffin or wax in the pot. While it is melting set up your dipping and drying area. Line your drying area with newspaper or wax paper. This is the area that the pine cones are going to rest on while they are drying. If you want them to come up easier, we recommend going with the wax paper, the pine cones will stick to the newspaper some.

Be sure to keep your eye on your wax during the set up so that it doesn't burn. Your wax needs to be liquid, but not so fluid enough that it just drips right off of your pine cone. If it is that fluid you will want to let it cool a bit before you start dipping your pine cones in it.

After you've dipped your pine cone let it drip over the pot for a bit before putting it in the drying area, this just helps to keep from making a huge mess by having wax drip everywhere. You may need to dip some of your pine cones again after they've dried for a bit. The wax needs to lightly cover the pine cone all over:

While waiting for being used as firestarters these pinecones make a lovely decoration when displayed in a small basket.


There are other methods to creating pine cone fire starters. Some use cupcake tins for an interesting take on this project. A quick search will give you tons of various tutorials.

Monday, December 10, 2012

Some Chimney and Fireplace Keyterms

Sometimes knowing the lingo to your chimney and fireplace can help when you are shopping for items, cleaning, or explaining things regarding your chimney and/or fireplace.

Air-to-Fuel Ratio: The ratio of air to fuel in an appliance that burns solid fuel. If you are burning 1 pound of wood you typically need 35 pounds of air.

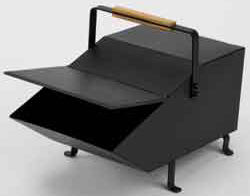
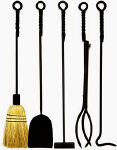
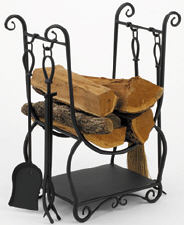
Andirons: Two pieces of metal that are usually decorative in nature that support your firewood in the firebox.

Ash Pit: Typically located in the chimney base, it is a storage compartment for ashes. There is usually an Ash Pit Door that allows access to clean it out, the ash pit door is also called the Clean Out Door. Most wood stoves also feature an Ash Drawer, it serves the same purpose as the Ash Pit.

Back Puffing: this occurs when there is a negative pressure draft created in a venting system.


Blower: a fan that forces air that is under pressure.

BTU: British Thermal Unit. One BTU is the amount of heat energy that is  needed to raise the temperature of one pound of water by one degree Fahrenheit. It is approximately the amount of heat produced by one lighted kitchen match.

Burn Rate: number of pounds of fuel that is consumed in one hour of combustion.

Chimney: One or more vertical passageways for conveying flue gases outside of the home.

Chimney Cap Or Flue Cap: a factory-fabricated appliance that is installed on the top of the chimney in order to protect it from water intrusion, birds, leaves, and other debris.

Clearance:  the minimum distance that is required between a wood stove or fireplace and any combustible materials. This is defined in your local fire and building codes.

Combustion: rapid oxidation of fuel that gives off heat and light. Also known as burning.

Creosote: deposits in the chimney and/or flue that originate as condensed wood smoke having three stages. 1st stage is soot, 2nd stage is lumpy and crisp, 3rd stage looks like roofing tar and is smooth as glass.

Damper: A moveable blade located in the throat of the fireplace. Designed to disrupt the air flow into the chimney.

Double Wall: chimney constructed of an inner liner and outer shell, reducing conduction of heat to the outside. This allows the chimney to be installed without the danger of combustion to support materials.

Draft: pressure difference caused by rising gas, which draws combustion air into the appliance and expels the exhaust gas outside through the chimney.

Efficiency: expressed as the percentage of heat that goes toward actually warming the room as opposed to being vented outdoors.

Firebox: The area that contains the grate or andirons upon which the fuel is arranged for burning.

Firebrick - heat refractory brick used in the construction of a firebox.

Fireplace - includes the hearth, firebox, fascia, and chimney.

Flashing - sheet metal used to make a water-tight seal between the chimney and the roof.

 Flue: passage in the chimney that moves the products of combustion up and out of the chimney.

Flue Collar: main point of connection between the chimney and the vent.


Flue Liners: materials that add protection to the inside of the chimney, protecting it from intense heat.

Grate: a raised grid-like metal (most used metal being cast iron) structure where fuel is placed in the firebox.

Hearth: area that surrounds the stove or fireplace, mostly created from non-combustible brick or tile.

Seasoned Wood: wood that has been allowed to dry from 6 to 12 months. This type of wood burns more easily and emits fewer particulates than freshly cut wood, which results in less creosote build up.


Vent: continuous passage from the flue collar to the draft hood. Flue gas temperatures at the outlet do not exceed 600 degrees.

Friday, November 30, 2012

What are Fireplace Andirons

If you've been looking at accessories for your fireplace you have probably come across fireplace andirons. Most andirons are made in a way that they look very nice and decorative, but they are more than just a pretty addition to your fireplace.

Andirons are for holding logs in the fireplace so that they do not roll out into the floor; they also keep the logs lifted so that air can get around the logs and help to feed the fire in your fireplace.

Most people have replaced the andiron with a fireplace grate. When holding smaller pieces of wood the grate is preferred as it has more surface area for the wood to rest upon. But some people prefer andirons, since they allow the fire to be closer to the bottom of the fireplace, in a smaller fireplace this is sometimes necessary.

Andirons are considered by most to be prettier in a fireplace than a grate. Andirons began to be made in a more decorative manner during the Italian Renaissance.


Thursday, November 22, 2012

Wood Stove Smoking into Room

Are you noticing smoke inside your home when the stove is burning or when you've opened the door to load additional wood.

Here are the things you need to check:
  • Chimney Cap: these can become clogged, most chimney caps have spark screens and cold, wet, damp weather can cause the screen to attract more embers than it should and it will then clog up.
    -Issues that can add to the clogging of the chimney cap include: wet wood, small fires, and damping down the stove too early. But this is an easy solution. Clean your chimney cap and the smoke should go out.
  • Draft: if the issue is not with the chimney cap, then you may not have a good draft. This could be due to the flue being cold. Some recommend to "pre-heat" the flue prior to lighting the fire.
  • Dirty Chimney: This can cause decreased room for the smoke to exhaust. Keeping your wood stove and chimney clean and properly maintenance will help to prevent this. You should clean your wood stove and chimney a minimum of once a year, but it is recommended to have your chimney cleaned for every 2 cords of wood that are burned through your wood stove.

Edit we have had a tip added in a comment on this pin on Pinterest:
Quote from Aaron J. on Pinterest: "Great advice, one other thing that might cause back smoke is an incorrectly sized chimney liner or a cracked liner."

Thanks for the tip Aaron!

Wednesday, November 14, 2012

Fireplace Cleaning

It is the time of the year to be using your fireplace, before you start using it you will want to be sure that your fireplace is clean. Ideally, you should clean your fireplace in the summer when you won't be using it for some time, but if it has not been cleaned, then there is a risk of having creosote or soot cause a fire.


Now you will want to be sure that all the ash has cooled before you go about cleaning your fireplace. 

To remove the ashes you can use fireplace tools such as shovels, brooms, ash rakes, etc. 

Once the ashes have been removed you will need to take out grates, andirons, fire-backs, etc. I recommend taking these to the yard to clean with a wire brush, then you can use a specialized polish on them to restore them to look practically new. Now is also a good time to clean your fireplace accessories.

You will want to use a wire brush to remove any build up of creosote and tare on the damper and lower part of the chimney. Shovel or vacuum this debris out of the fire box.

To clean the firebox you can use solvents created for cleaning fireplaces, you can also use washing soda, vinegar, or TSP with warm water. Use a stiff bristled brush on the inside of the firebox once your cleaning solvent of choice has had time to soak.

If using hot water & vinegar or hot water & washing soda you will want to scrub the liquid into the firebox and let it soak for about 20 minutes or so. Come back and scrub your firebox and fireplace with a generous application of this cleaning liquid.

Once your fireplace is clean you will want to rinse it off with warm water. Let your firebox air out and dry. Close your damper to prevent the fireplace from sucking air out of your home. But be sure to open it before starting a fire.

You will probably want to go ahead and clean your chimney at this time, also suggested reading: Chimney & Fireplace Tips

Tuesday, November 6, 2012

History of the Fireplace

Fireplaces have been around since the invention of fire. They were originally found in caves, but with no chimneys or ventilation. Evidence of man-made prehistoric fires exist on all five continents.

Fireplace grates came into play around 1678 when Prince Rupert raised the grate of the fireplace which improved the airflow and venting system.

The fireplace as we think of it today really came about during the Victorian Era. The main design of the fireplace really hasn't changed that much since those times, they consist of two main elements: the surround and the insert.

There are many accessories for fireplaces today; grates, fire screens which originated as a form of furniture that was a shield between people and the fireplace. Fire screens help protect the room from open flames and flying embers. Andirons hold up the fire wood so that air can more easily pass around it, the Italian Renaissance saw the andiron go from plain to more decorative works of art.  The fireback was first seen in the 1500s, these tools help to hold the heat and project it back into the room instead of allowing it to be lost up the chimney. Fire irons or fire pokers have been used with fires since the paleolithic period, these allow you to stir up the fire. Bellows help to get a fire started by give blasts of air to feed the fire. These are just a sampling of the tools and accessories that can be used with a fireplace.


 Sources:
http://en.wikipedia.org/wiki/Fireplace#History
http://www.fireplaces-fireplaces.com/guides_Fireplace-History.htm

Thursday, November 1, 2012

Kerosene Heater Safety Tips

When using heating such as kerosene heaters, it is always a good idea to follow safety tips to ensure that you and your family stay as safe as possible. We've gathered some information for you on using kerosene heaters more safely.

It has been found that the majority of heating related fires are caused by kerosene heaters. In these cases it was found that more often the fire was caused by misuse or abuse of the kerosene heater rather than a problem with the heater itself. The first thing you should do with any type of back up heating options, such as kerosene heaters is to read and follow the manufacturer's instructions.

To choose a kerosene heater you should keep these things in mind:
Be sure the heater that you purchase has a UL (underwriters laboratory) listing.
Choose a heater that has an automatic safety switch that switches the heater off automatically if there is an event in which the heater gets tipped over.
Some special features that are handy: An automatic starter that will eliminate the need for matches, a fuel gauge to help ensure you do not overfill the heater as overfilling can be dangerous, a safety grill to help prevent contact burns.

Be sure that you have a smoke alarms and a carbon monoxide detector in your home.

Always take care of your wick and know how to change your kerosene heater wick.

When refueling your heater, you need to wait until your heater has cooled and refill it outside. If you refill a heater when it is hot or still burning it can start a fire. Use only crystal-clear k1 kerosene in your kerosene heater.


Monday, October 29, 2012

How Does a Pellet Stove Work

Many people are making an investment in a pellet stove for their home. You may have heard them mentioned in conversation. You probably have an idea of what a pellet stove is, but how does it work?

A pellet stove does not burn regular firewood. They burn wood pellets. These pellets are put into the hopper on your stove and the stove automatically dispenses the pellets from the hopper via an electronic auger system into the burn box. This system turns slowly and carries the pellets at a steady rate to deposit into the hot fire. There hot air that is blown across the fire by a fan that enables the pellet stove to keep up high temperatures so that the pellets burn evenly and efficiently. There is also a second fan on the pellet stove that blows hot air through heat exchanger pipes that run through the interior of the stove to provide long lasting heat in this low maintenance unit.

Before using your own pellet stove you should be sure to read all the instructions and contact the manufacturer if you have any questions regarding how to safely use your stove. 

Keep in mind that if you are looking for a heating system as a back up during power outages that a pellet stove is not for you. Pellet stoves require electricity in order to work.


Thursday, October 25, 2012

Dry Air from Wood Stove Heat

Some people have found that by using a wood stove in their home that the air seems to be dryer. This would be an accurate observation by a wood stove owner. Heat from a wood stove is a dry heat and can reduce the moisture in the air of your home.

So what can be done to remedy this situation? There are a couple options.

The first option is to use a wood stove steamer. A wood stove steamer is used by filling it with water and setting it on top of your wood stove. The heat from the stove converts the water to steam. This will add moisture to your air. It is advisable to place a wood stove trivet under your steamer in order to avoid cracks or dings being added to your wood stove. Some people also use the wood stove steamer to add nice aromas to their home by adding a few drops of an essential oil of their choice to the water in the steamer.

The second option to add moisture to the air in your home is to use a humidifier. Be sure to select one that is appropriate for your needs and follow the manufacturer's instructions on your unit.


Friday, October 19, 2012

Maintenancing your Stove Pipe

Quality steel stove pipe will last for many years, but there are some things that can cause premature failure of the stove pipe.

What can cause stove pipe premature failure?
  • Corrosion from acidic condensed flue gases. Flue temperatures need to be high enough to prevent water condensation to prevent this.
  • Corrosive gases that are present when burning household trash. To prevent this, do not burn household trash in your wood or pellet stove.
  • Excessive temperature. If your stovepipe is glowing hot then it will have a shortened life expectancy.
  • Humid weather can also cut down on the life of your stove pipe.
Be sure to check your stove pipe frequently for weaknesses in the metal and be sure to have your chimney sweep check it during your yearly inspection & cleaning. This will help to reveal faults in the pipe, hopefully before they have time to become a hazard.

To purchase stovepipe online:
For stove pipe visit: http://www.woodstove-outlet.com/woodstove/stovepipe.htm for pellet stove pipe visit http://www.woodstove-outlet.com/woodstove/pelletstovepipe.htm

Thursday, October 11, 2012

Tips on Using a Kerosene Heater

Having a heat source like a kerosene heater does take some safety precautions. When you purchase your kerosene heater you should first read all the instructions that come with them and be sure to store these instructions in a safe place so that you know where to find them if you ever need to refer to them in the future.

When using a kerosene heater you need to be sure to use only water-clear 1-K grade Kerosene in  your heater. Never use gasoline. Gasoline in a kerosene heater, even in very small amounts can greatly increase the risk of an explosion or fire. For this reason you should also NOT use any volatile fuels or solvents mixed with your kerosene that you are using in your heater.

Be sure that when you are storing your kerosene that you keep in a container that is recommended for kerosene use, also do not use a container that has gasoline previously stored in it. To help you remember which container is for kerosene use, you should label it. (Read more on Kerosene Storage)

Do not refuel your kerosene heater inside of your home. You should fill the tank outside, away from any combustible material, and be sure that the heater has been turned off and allowed time to cool before refilling. Also be mindful that you do not fill your fuel tank above the full level.

Be sure that smoke alarms are installed in your home before using a kerosene heater. Be sure to test your alarms monthly and replace annually. You also should have a fire extinguisher in your home, these tips are useful for any home regardless of whether a kerosene heater is being used or not.

If operating your heater inside a home you need to operate it in a room that has a door open to the rest of the house, be sure to have an outside window open at least 1 inch to allow fresh air to dilute pollutants. Do not leave the heater unattended.

Always, and we mean always, operate your heater according to the manufacturer's instructions. Also, be sure that the wick in your heater is clean and in good operating condition, if it is not, it will need to be replaced (Read more on Replacing a Kerosene Heater Wick)

Wednesday, October 3, 2012

Some Chimney and Fireplace Tips

When caring for a fireplace or wood stove, sometimes it is easy to forget about the chimney, we have written a few chimney articles in the past:


How to Decide on a Chimney Brush
How to Prevent a Flue Fire
Wood Stove Chimney Connection

But today we are bringing you a few extra chimney tips and facts along with a few for fireplaces:

Chimneys need protection from rain and from critters like birds and rodents that sometimes claim a chimney as their home. The best way to protect your chimney from these things is to install a chimney cap.

Know what size fireplace grate you should have: the grate should be no wider than the width of the back wall of the fireplace, it should sit about 2 inches away from the back wall and it should not be positioned too close to the front either or else it will cause your fireplace to smoke.

Do not allow any water to pool beside your chimney or foundation, this can cause water damage to your home.

If you paint your fireplace be sure to use a high temperature paint that is recommended for fireplace use. Some paints will let off noxious fumes when they are heated, so to be safe ask before making a paint purchase to use on your fireplace.

To keep your fireplace safe, please use a fireplace screen, this will help prevent sparks from flying out into the room and it can help keep loose clothing from being sucked into the fire. This is a feature that every fireplace should have.

Your chimney needs to be swept every year to remove creosote build up. Creosote is highly flammable and is the main cause of chimney fires.

Tuesday, September 25, 2012

Wood Stove from the Past

In a recent trip to the Great Smoky Mountain Heritage Center one of our employees saw a wood stove from the past.


In the homes that were set up in the Heritage Center the wood stoves did not have any stove pipe to show how they would typically be set up. But we know that in the past wood stoves made a huge improvement on people's lives, they were more heat efficient than the fireplaces and offered an easier way to cook. These homes were typically one room with an upstairs where the older children would sleep. The younger children would sleep downstairs with their parents where it was warmer and where the mother could look after the child during the night.

One of the stories that was shared at the Heritage Center was from a woman who remembered staying with her grandparents in their one room cabin. She slept in the upstairs loft, it was winter and snowed through the night, when she awoke, the snow had come through cracks in the walls and roof and had dusted her blanket. Even with wood stoves homes were not as well insulated as today's homes are.

But even now a wood stove can be a great addition to a home, especially as a back up heating system for those winter days when the snow storms knock out the power.


Monday, September 17, 2012

New: Kerosene Heaters

Kerosene-wicks.com now have kerosene heaters available for purchase on their website.

The heaters they have available are kero world heaters.

Kero World KW24G Convection Kerosene Heater
The above heater is the Kero World KW24G Convection Kerosene Heater. It has a fuel tank capacity of 1.9 gallons, a heat output of 23,000 BTU/hr, and a burning time of 9-12 hours. This heater is recommended for heating 920 square feet.

Kero World KW12 Convection Kerosene Heater
The above heater is the Kero World KW12 Convection Kerosene Heater. It has a fuel tank capacity of 1.2 gallons, heat output is 10,500 BTU/hr, and has a burning time of up to 12.5 hours. This heater is recommended for heating 400 square feet.

Kero World KW11 Radiant Kerosene Heater
The above heater is the Kero World KW11 Radiant Kerosene Heater. It has a fuel tank capacity of 1 gallon, heat output is 10,000 BTU/hr, and the burning time is 12-16 hours. This heater is recommended for heating 420 square feet.

This new selection of kerosene heaters have a starting price of $109.99 and up depending on the heater.

Friday, September 7, 2012

Basic Wood Stove Tips

For those of you who are new to wood stoves, here are a few basic tips to get you started:

Our first tip is a very basic one, but be sure to read the owner's manual/instruction manual on your stove. If you have misplaced it, try contacting the company who manufactures the stove for a copy of one. It is important to know how your stove works as different types of wood stoves can be different in how they should be used. Also, your manual will have helpful information on your particular wood stove.

Before using your stove, you will want to check that it has been properly installed. Be sure that there is a proper clearance around the stove, away from combustible materials. The floor also needs to have appropriate support for the stove and protection from it.

Be sure to use seasoned wood. Seasoned wood is wood that has been allowed to dry out. If the wood is still "green" then more of your fuel will go towards drying out the wood while it burns. This extra moisture can cause excess creosote build up, which can cause chimney/flue fires. It is also advised to burn hardwoods. When you burn soft woods they burn more quickly than hardwoods do, and they also emit a larger amount of combustible gasses which causes fuel to be wasted in the form of excess unburned smoke.

If using synthetic logs, be sure to follow the instructions on the packaging. 

It will also help you to know how to build a fire in a woodstove


Wednesday, August 22, 2012

Wood Stove Accessories

If you have a wood stove then you know that there are certain tools and/or accessories that make life with a wood stove a bit easier. If you are thinking about getting a wood stove you will want to also look into the following items:

Ash Container:

A good ash container is necessary for when you empty the ashes from your stove. The ash container is better than other objects (such as buckets, etc) because they are created to handle the heat of any ashes that may still be smouldering. You will still want to be sure that your ash container is placed in a safe spot until the ashes in it cool COMPLETELY before disposing of your ashes.


Fireplace Tool Set:

This may seem odd, as you have a wood stove, not a fireplace, but the majority of fireplace tools will come in handy with a wood stove as well. Most of the time it is a bit more practical money-wise to purchase a set instead of purchasing all of the tools separately.


Log Carriers, Baskets & Racks:

A log carrier will come in handy when toting your wood indoors from your wood pile. Once inside you will need a place to store the wood that you just carried in. The option of a log basket or a log rack is up to your personal preference. The only benefit to a log rack is that some of them are made to hold more than just your logs. Some log racks can also hold your fire tools that you will often need to be in reach of your wood stove.

Wood Stove Cookware:

The power is out and you are hungry. If you have a wood stove that has a cooking surface on it then so long as you have some wood stove cookware then you are set to make a meal. Cookware for a wood stove is typically cast iron. This makes the cookware more durable for use on a wood stove.

Friday, August 17, 2012

Kerosene Heater Information

Now is the time to make sure your kerosene heater is working, as you don't want it to go out if you need it during the winter. First step is to be sure you have enough kerosene heater wicks on hand if they are needed.

We have written some blogs in the past about kerosene heaters, here is each with a description of what they are about. We hope these are beneficial to you:

Kerosene Heater Wick Info: how to clean burn your kerosene heater, when to change your wicks.

Kerosene Heater Odors: what they mean.

Storing Kerosene: how to store and how long.


Tuesday, February 28, 2012

How to Stoke a Wood Stove Fire


Knowing how to properly stoke a wood stove fire is an important part of owning a stove. Proper stoking will help to keep the wood burning properly in order to keep your home heated. 

Items you will need:
Firewood (properly dried and split)

When you are stoking a fire you, it is after the fire you already started is getting low. (To start a wood stove fire read: http://woodstoveoutlet.blogspot.com/2011/11/how-to-start-fire-in-wood-stove_25.html)

1. Poke your red hot coals with your fire poker and form them into an even bed of coals. Lay two pieces of firewood parallel to one another on top of the bed of coals. Close the vent on the front of the wood stove door to where it is closed halfway. Wait for about one hour then check wood.

2. If the two pieces of wood that you put in before are now coals you will want to add two more pieces. If they are still formed logs, close the woodstove door and wait for about 30 minutes before checking again. Once the wood is coals repeat Step 1 again. 

It is advisable to check your woodstove at least once an hour.

Friday, February 10, 2012

Wood Stove Chimney Connection

When you are installing a wood stove in your home you will want to be sure to choose the correct size wood stove and know wood stove safety installation.


When connection your woodstove to your chimney you will need to know that there are four main methods to do this:
  • Direct connection to a masonry chimney.
  • Passage through a flammable partition into a masonry chimney.
  • Entry into a fireplace and chimney.
  • Outlet through a wall or ceiling through a factory built metal chimney.
Direction Connection to a Masonry Chimney:
When connection directly into a masonry chimney you will want to be sure that the stovepipe that is inserted penetrates to the inside edge of the masonry liner, however, it should go NO further than that. It will then need to be sealed with masonry cement. If you use a masonry thimble that is set into the chimney to accept a slip in section of pipe then the masonry cement will not be needed. Keep in mind that if you cannot easily gain access to this connector for cleaning, you will need to use a masonry thimble so you will be able to remove the pipe for periodic cleanings.  

Passage Through a Flammable Partition into a Masonry Chimney:

The second connection method, passage through a flammable partition into a masonry chimney, covers any connector which passes within 18 inches of a flammable partition. NFPA regulation #211 specifies that in these cases the wood stove installation should include either a vented metal thimble which has a diameter 12 inches larger than the stovepipe or that a masonry thimble be ringed by at least 8 inches of fireproof brickwork. According to Mother Earth News the only other prudent option would be to leave a minimum of 18 inches of space around the outside of the stovepipe and then close your hole with a flame-resistant barrier.
Entry into a Fireplace and Chimney:

If connecting your wood stove to the flue above the fireplace then you must plug your chimney below the point of connection. If you are exhausting through the fireplace then the entry to the fireplace must be sealed. Doing this helps to prevent burning embers from falling down into your fireplace and possibly onto the floor (which is a big fire hazard) but it also helps to maintain the proper draft for your wood stove. It is best if chimney entrances for wood stoves are above the fireplace, however some considerations will require that the connection be made through the sealing partition and into the actual fireplace. In any chimney, but especially a fireplace with a cooler external chimney you should extend the stovepipe so that it turns up and into the chimney to help prevent heavy creosoting.  (Read more about Creosote and Flue Fires).

Outlet Through a Wall or Chimney with a Factory Built Metal Chimney:


Passage of stovepipe through any floor, ceiling, or fire wall is prohibited by NFPA regulations. However, you may pass the stovepipe through a wall, floor, or ceiling if you use a factory-built insulated chimney. If you do not have a suitable masonry chimney then this type of piping is the only option you have.

If you have any concerns about installing and connecting your wood stove speak with your local building inspector to get advice, knowledge about local building codes and possible a recommendation on someone who can do the job for you safely and effectively.

Insulated Thimble


Check back for future Woodstove Safety information including:
Woodstove Safety: Choosing and Installing


How to Prevent a Flue Fire

Wednesday, January 25, 2012

How to store kerosene and how long it can be stored

If you have a kerosene heater for use when the electricity goes out, you may want to have kerosene on hand for that time. In order to do so you must be able to safely store kerosene for later use.

 So how can kerosene be stored?
Kerosene should be stored in new, clean, sealed containers that are clearly marked for kerosene. If you store your kerosene in used drums, milk containers & other used plastic jugs, and/or gasoline cans then your kerosene can become contaminated, which will result in harm to the kerosene wickor even a fire (we recommend this company to help you select your kerosene wick) .

How long can kerosene be stored?
Three months is the longest that we've seen kerosene being recommended for being stored. When kerosene is allowed to stand for longer amounts of time the kerosene will break down and absorb water. Sludge will also develop in the fuel due to bacteria and molds that live in kerosene that feed off of fossil fuels. When fuel with sludge build up in it is used, it will clog the heater and harden the wick.


By keeping your kerosene in good shape your kerosene heater will run more efficiently and last longer.
Related Posts Plugin for WordPress, Blogger...