Thursday, December 15, 2011

Why your Fireplace Needs a Fireback

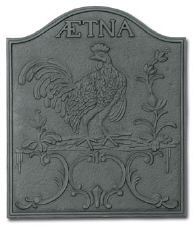
Not only do fireplace firebacks add a touch of history, romance, and practicality to your fireplace, they are also both functional and decorative.

What can a fireback do for your fireplace?
  • They retain and radiate heat from your fireplace back into your room. Which will keep your home warmer and help save more on your heating bill.
  • The prevent and conceal damage to the firebrick in the rear of your fireplace. Fireplaces, despite how far materials in home building have come since the earlier years of fireplaces, are still vulnerable to damage from the intense heat that a fire gives off, the fireback will help to prevent expensive damage to your fireplace's masonry.
  • Firebacks can be used with both wood fires or gas logs.
Interested in owning a fireback for your fireplace? How do you know what size you need?

In choosing a size for your fireback you will need to be sure that it is large enough to protect the area directly behind the fire. But it does not need to be so large that it extends into the flue. A fireback that extends into the flue can cause problems with the draft and also interfere with the damper in your fireplace.


At woodstove-outlet.com we have a beautiful selection of firebacks for fireplaces.

Friday, December 9, 2011

How to Prevent a Flue Fire

Tis the season to snuggle up next to a warm fire. But that romantic notion can easily be shattered and lost if a flue fire starts. How can you prevent a flue fire from happening? Well the first step is to know what causes a flue fire.

Flue fires are typically created by creosote build-up. Creosote is a very thick, sticky liquid that will stick to nearly anything. The burning of wood causes the creation of creosote naturally. Creosote is naturally very flammable and its appearance can vary from being be sooty or ash like, sticky, tacky, and runny tar glaze, dry honeycombs or curly flakes. It can also be a dense, hard, and shiny black tar glaze.You should be sure to clean your chimney and flue every year to remove creosote build up from the previous winter's fires, you will need a chimney brush to help in cleaning. If you do not feel comfortable cleaning it yourself, you can hire a local chimney sweep.

There are also things that you can do when it is the season to be using your wood stove or fireplace that can also help in preventing a flue fire.

When first building a fire, make a small, very hot fire, this will create a good updraft so that there is less buildup on the flue. (For more info read: How to Start a Fire in a Woodstove)

Always, burn wood that is well seasoned and/or dry. (For more info read: How to Season Firewood)

Avoid burning large amounts of paper and cardboard, using them to start a fire is fine, but do not burn more than you need. Wood stoves and fireplaces are not meant to be trash burners. Certain types of material will cause a much larger amount of build up in your flue than others.

Another little tip is to toss a handful of salt thrown on the flames occasionally, it will help loosen the soot. You should do this once or twice a month.

Try not to use extremely pitchy wood for anything other than starting the fire, as this wood will create more build up. Sometimes it cannot be helped, but be aware that by using this type of wood that you will have more creosote build up.

If you do have a flue fire, do not panic, call the fire department, and do not pour water into the firebox (this can have explosive results). You can pour salt or use a foam style fire extinguisher. But first and foremost get yourself and your family to safety. Things can eventually be replaced. Lives cannot.


Monday, December 5, 2011

How to Properly Dispose of Ashes from Wood Stoves & Fireplaces

While browsing the internet, I came across a news article dated 11-23 which was titled, "Forest Service urges proper disposal of woodstove and fireplace ashes"


Apparently there have been some forest fires due to some people disposing of wood stove ashes improperly. And there have been home fires that have started because of improperly stored fire ash.


Hot coals can hide amongst the ashes and stay hot for up to 4 days (sometimes longer). These coals were once used to reignite fires when people did not have an easy way to light a fire. But now these coals are a danger to our forests, fields, homes, and more if they are tossed out while still hot.


So what should you do with those ashes from your fireplace or wood stove?
Ash Containers are a great way to store hot coals and ashes from a fireplace or wood stove.  It is recommended to add a little water after putting ash in to be sure that any hot coals are extinguished. The ash should be stored away from anything flammable in case any cinders happen to escape. Be sure the lid on your ash container is tightly on.
Once you are sure that your ash is no longer hot, and that there aren't any coals still burning, there are a few things that you can do with your ashes.
  • Use your ash around plants that thrive in alkaline soil. 
  • Mix with water to make a paste to clean wood blemishes and water rings on wood.
  • They can be sprinkled around the perimeter of your garden to repel slugs and snails.
  • You can add them to your compost pile.
If you are safe with your wood stove and/or fireplace ash, then you can help prevent accidents from happening.


Stay safe and warm this winter!


Wednesday, November 30, 2011

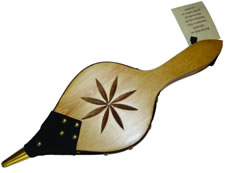
How do Fireplace Bellows Work?

Fireplace bellows are very beautiful tools. They have been around since 930 B.C. Their design has stayed fairly well the same over the years with a few improvements made, particularly in the 1600s.


A fireplace bellow works as a single air pump tool. They are triangular shaped and consist of an air chamber and a valve. Grasping the handles and pulling them apart fills the chamber with air, while press the handles back towards each other directs the air out of the valve or nozzle.

This air flow can be used to get a fire going, as fires need a little air (oxygen) to get started well. Using a fireplace bellow is much safer than manually blowing on the fire as you have to get too close to the flames to make much of an effect on them.

Friday, November 25, 2011

How to Start a Fire in a Wood Stove

Wood stoves can be a little tricky when it comes to starting a fire in one. But it can be done.

Materials:
  • Newspaper
  • Cardboard in 2 inch strips
  • Kindling
  • Small pieces of firewood
  • Matches
Take 4 or 5 pieces of the newspaper and separate them, bunch them up and lay them on the bottom of the firebox bunched near the door.  Lay a couple of the 2 inch cardboard strips over top of your newspaper, then place some of the kindling on top of the cardboard. Lastly, place 1 or 2 small pieces of the firewood on top. Be sure they are smaller and not much over a 2 inch diameter.

Open your stove vent all the way and start your fire. Once your small pieces of firewood have caught fire and burned for several minutes you can add a couple more pieces of firewood. Using a fire poker, or other wood stove tools, you may want to carefully bunch and turn the debris in the wood stove before adding the larger pieces of wood. Keep your stove's vents open until the larger pieces of wood are well ignited and then you can adjust them to your desired heat output of the stove.

It is said that wood stoves work best when they are used in cold weather (32 degrees and below) and for longer than 1 hour.


For more information on Firewood Visit:
How to Cut Firewood
How to Season Firewood

Sunday, November 20, 2011

How to Decide on a Chimney Brush

Every chimney is a little different. This is part of the reason why there are so many different sizes and types of chimney brush. So, how can you tell what size of brush and type of brush bristle you are going to need?

First you will need to know the inner dimensions of your chimney. There is only one way to find this out. You, or someone who can do this safely, will need to climb on top of the roof and measure the inside of the chimney (be sure that there are no fires burning at this time so that there will be no heat or smoke to contend with). Use proper safety precautions and equipment while doing this task.

If your chimney is metal or prefabricated then you will need to remove the chimney cap so that you can measure across the inner diameter of the chimney. With a metal chimney, a poly chimney brush is recommended so that it will not scratch or damage the interior of the chimney.

If your chimney is a masonry chimney then you will need to measure the flue's inner dimensions across both sides. The brush that you purchase will need to be a minimum of as big as the chimney liner or it will not be able to reach both sides of chimney, resulting in a poor job cleaning. However, you will want to be careful not purchase too big of a chimney brush either as this will make cleaning your chimney a very difficult task. Typically, wire chimney brushes are recommended for masonry chimneys.


Tuesday, November 15, 2011

How to Season Firewood (How to Dry Firewood)

Firewood can be a little tricky. You can't just go pick out a tree in the forest, cut it down, and burn it right away. That wood needs to be seasoned or dried before you burn it in your wood stove.

Why does firewood need to be dried?


Firewood that has not been dried has moisture in it.  When wood has moisture in it, the heat from your fire goes towards heating up that water and burning it off (or evaporating it) which makes your fire not burn quite as hot as it should. In addition to your fire producing less heat, your stove is producing condensates. These condensates are what can result in a chimney fire. And this is a very dangerous scenario.

So what can you do to avoid chimney fire causing condensates?


You can season your firewood. In most scenarios, to season/dry your firewood, you would cut and split it in the spring to small manageable pieces and allow it to air dry throughout the spring, summer, and early fall. (Until it is cold enough to need to fire up your wood stove again). Some people prefer to give their wood even longer to season, letting it air dry for up to 2 years. This length of time is preferable if the pieces of wood are large. The bigger your firewood, the longer it will take to dry out. This is why if you do not have 2 years to allow your wood to dry then you should split it into smaller pieces.

While your wood is seasoning, you will want to keep it out of the elements (snow and/or rain) and up on a dry base. If you have your wood in a shed or storage building to season, you will need to have it to where wind and air can pass through to help dry out the wood by wicking away the moisture.

How do I know if purchased firewood is seasoned?


If you are purchasing your firewood from someone, then one way to tell if it is seasoned is if there are cracks in the grain on the end of the pieces of firewood.

Tuesday, November 8, 2011

Kerosene Heater Odors

Have you ever had your kerosene heater fired up, things are starting to get nice and toasty and you start to notice that something isn't smelling quite right? Well, what could cause that bad odor? Is it something that you should be worried about? And how can you prevent this odor in the future?

Many times, a bad odor after your heater is burning is caused by a fuel that is low quality. High sulfur content in your fuel, or lower grade kerosene cannot be burned completely at the temperatures that are reached in a portable kerosene heater.  These unburnt hydrocarbons will collect on your heater wick which causes the wick to harden and will cause low burn and odor problems.

Another cause of this odor could be fuel that was dripped on the heater. You need to be highly careful not to drip any fuel onto your heater. Fuel that is on the outside of the heater or on the drip pan can cause a very strong kerosene smell when your heater gets hot.

A low temperature setting on your kerosene heater while it is operating, or a wick that is installed too low can cause incomplete burning of the fuel, this also can cause an odor. Your heater should always be operated on high, turned down just enough to keep it from sooting. For your wick height, you need to refer to the owner's  manual for the proper wick height for your model.

As for safety, fumes in general are not good to breathe in, but if you follow the advice given above and always know and read your owner's manual and follow all instructions, do not leave the heater unattended, frequently check for recalls, and complete any maintenance on your heater when it is due then your heater should stay in working condition.

Monday, October 24, 2011

What is a Pellet Stove?

Pellet stoves are among the cleanest wood-burning heating appliances that are available on the market. However, instead of burning "regular" wood, they burn small, compressed pellets that are made from ground, dried wood and other biomass wastes. Pellet stoves deliver high efficiency overall.

One difference between a pellet stove and wood stoves/fireplaces is that the majority of pellet stoves require electricity in order to operate. This electricity is needed for a small electrical device in the stove that controls the flow of pellets into the stove, where they are burned. Some models even include a thermostat.

While there is a drawback of having a stove that uses electricity (no heat if the power goes out). Having a thermostat is a huge benefit that you won't see on other stoves or on fireplaces.

Thursday, October 6, 2011

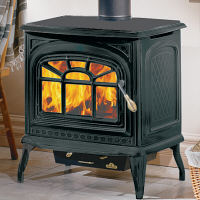
How Wood Stoves Work

Wood stoves have been in homes since the 19th century (if not before). These useful little stoves helped families keep warm in the winter and gave them a place to prepare their food (see cooking on a wood stove). The wood stove of today is a bit more evolved than its past ancestor. Wood stoves now are clean and efficient and use cheap renewable local fuel, do not rely on petroleum, and they produce less pollution than a fireplace.

Wood stoves provide a heat source through the burning of wood.While the wood burns heat is given off through the tops and sides of the stove while the wood smoke goes out through the wood stove pipe, flue, and then the chimney.

For a wood stove to be truly efficient it needs to be properly installed, and you will need to be sure to choose the right size wood stove for your home.

Wednesday, September 14, 2011

How to Maintain your Woodstove

Here are some articles that you may want to revisit that we have published on our blog over the past few months:

Have another problem that you need some info on? Leave us a comment and we will see what we can do to answer your question!

Friday, September 2, 2011

Cooking on Your Woodstove

 When cooking on a wood stove you will want to use appropriate cookware. As most people have found using cast-iron cookware on a wood stove is the best method.  Cast-iron cookware is easy to care for and it is designed to provide even heating to the food that you are cooking. With proper care and treatment you can stave off rust and keep your foods from sticking to the metal.

To treat your cast-iron cookware it is recommended to coat the pan with vegetable oil and heat for about two hours in a 300-degree Fahrenheit oven. You will need to keep a check on your pan during this process to see if the oil has been absorbed or if more oil needs to be added. Once the pan is done let it cool and then wipe off any excess oil.

To clean your cast-iron cookware after using it, you will want to clean it with a paper towel and use salt for any stuck on foods or stubborn spots. Most people try to avoid using soap or detergents as it takes off the oil or seasoning of the pan.

To cook on a wood stove you will need to keep in mind that the technique can vary depending on the type of fuel that you use in your wood stove. If you use coal there is a great amount of heat that will be emitted. With any fuel the heat will not be distributed evenly on your stove's surface.

To keep foods from burning or not cooking enough you will have to move the pots around, if a pot is boiling to much you will need to move it to a cooler area of the stove or set it up on a wood stove trivet. If you have a pot that needs to boil but isn't, place it directly over the area of the stove where the wood or coals are burning at their hottest. This area tends to be the stove top's center.

Now that you have an idea of how to cook on a woodstove, your imagination and culinary preferences will be your guide in taking these steps to the next level.

Wednesday, August 24, 2011

How to Polish a Woodstove (Cast Iron)

If your stove has aged some and isn't as pretty as it once was, you might want to consider investing in some woodstove polish.

 
Wood stove polish has natural waxes in it that protect and nurture the metal that the stove is made of.

How to polish:
  1. Get a good polish. Williams Stove Polish or Rutland Stove Polish Paste are two good ones. (Be sure to read the directions that come with these to be sure they are not different from these instructions. If they are it is best to go with the manufacturer of the product's instructions).
  2.  Procure some latex gloves, as this polish can stay on your hands quite well.
  3. You will probably want a quality paint brush to apply the polish with. You don't want bristles falling off onto the stove. (The brush will come in hand to get small or detailed areas on the stove). Oh and you'll also need a nice clean lint-less towel. I've used the old cloth baby diapers for projects that need to have no lint left behind, with good results in the past.
  4.  Apply polish to your stove per the package instructions. 
  5. Once the polish is dried if you so choose you can hand buff the stove for a lovely shine. 

Wednesday, August 17, 2011

Adjust your Woodstove's Door

So now that you know How to Change a Wood Stove Gasket, you might need to take a look at the door on your wood stove to be sure that it doesn't need to be adjusted.

If your wood stove door seems to be loose then it needs to be adjusted. Now how does one go about doing this?

It is a fairly simple process in all honesty.

If your woodstove's door is loose that means you are not getting the level of efficiency that you should have and that soot will build up faster. This time of  year is a good time to test the tightness of the seal between your door and stove, since your stove needs to be cooled down in order to test it. Take a dollar bill and place it along the door seal; now, close the door and try to pull out your dollar. If the dollar slides out easily then that is a good indicator that your door is loose. If the door is loose the latch needs to be adjusted. After adjusting your latch test the door using the dollar bill again. If the dollar still slides out and you haven't changed your woodstove gasket then you will want to look into replacing your gasket.

Monday, August 8, 2011

How to Replace a Woodstove Gasket

Okay, so you read over how to winterize your home and have come to the conclusion that your wood stove needs a new gasket after you serviced it. So how exactly does one replace a wood stove gasket? Well you are in the right place to find out:
First you will need to look at your stove's information or user manual to see what size and type of wood stove gasket you need. 
Then you will need to use a screwdriver and pry and scrape out the old gasket and clean the door's surface thoroughly with a wire brush.

Then you will apply a bead of high-temperature cement using a caulking gun. Now you will embed the glass-fiber door-gasket rope. Close the door and secure it to allow the gasket to cure. Follow your gasket's instructions (they should be found on the label). 

If you serviced your wood stove and are unsure as to whether the gasket needs to be replaced are not, there are some tips:
Take a piece of paper, stick it in between the gasket on your stove, then try to pull it through. You should feel resistance. If you do, your gasket is still good. However, if you can move it in and out (or up and down) the seal is not tight enough and you need to replace your gasket.

Monday, August 1, 2011

Time to Start Winterizing Your Home!

So the weather has been over 90 degrees in most places and the thoughts of winter are far from most people's minds. But that doesn't mean that you shouldn't be preparing for the upcoming winter months. Now is the time to get all those little (and big) tasks done:

If you have an attic you will want to check your insulation. If it is looking a little thin or sparse you will want to add some extra insulation.  This will keep you from losing as much heat in the winter as heat rises and will escape through your attic if it is not properly insulated.

Add weather stripping around doors and windows.

While you are adding the weather stripping, check for cracks around your doors and windows. You will need to caulk these.

Outlet gaskets are great to add to the outlets that are on the outer walls of your home. These gaskets help to eliminate drafts. Drafts are a great way for heat to escape from your home (and for cool air to escape through in the summer).

If you have a furnace you will want to clean it and replace the air filter. Dirty furnaces and furnace air filters can cause fires.

Service your wood stove. (This might include needing to change your wood stove gasket). If you are not comfortable cleaning your chimney and checking your wood stove over yourself, then you should be able to find a professional chimney sweep in your area that you can hire to do these things for you. Better safe than sorry.

Friday, February 18, 2011

3 Fireplace Myths

There are some myths that have been floating around about fireplaces for some time now.  Well, we want to help you out with a few, some are more truth than myth, other myths can be fixed with just a few tweaks to your fireplace, and the rest are just that; myths.
  1. To be green (or to save on my electric bill) I should never use my fireplace.
    While it is true that fireplaces can suck a lot of heat out through your chimney, most of the time this can be resolved by using a fireback or installing a fireplace insert.  A fireback maximizes the warmth of your fireplace and a fireplace insert decreases the amount of warm air lost by around 60%.
  2. A fireplace is inefficient when operating.
    Fireplaces actually lose more heat when they are not operating, due to leaks around the damper.  This can be easily resolved by installing fireplace doors.  Fireplace doors will help to add an extra barrier and seal your home from leaking out warm air or cool air (depending on the season). 
  3. It is okay to use unseasoned wood.
    Unseasoned wood causes more problems that just taking longer to ignite than seasoned wood.  Unseasoned wood can lead to creosote building up in your chimney at a much quicker rate than it normally would have. And a lot of chimney fires are due to creosote build up. A way to prevent this problem is to always use seasoned wood and to have your chimney inspected yearly by a certified chimney sweep. 

Monday, February 14, 2011

Wood Stoves - A bit of history

I'm sure many of you have seen, used, or know someone who has a wood burning stove.  These stoves have been around for quite some time, with Benjamin Franklin perfecting them in his design "The Franklin Stove" in the 1740s.  Benjamin Franklin made the stoves more efficient, they heated homes more easily while still using less fuel.  However, these original stoves were made for primarily heating the home.  Free standing stoves, that had flat tops ideal for cooking upon, came a little later. Cast iron cookware was and is still used upon wood burning stoves for cooking. This freestanding design was quite popular due to the ability to cook upon it, and it is a design that is still used today.

The use of a wood stove has not much changed since its earlier uses.  In order to use one you will need to build a fire inside the oven, and if your stove has a flue it will need to be opened in order to allow for the smoke to go up through the chimney and out of your home.  After you get your fire going, you will want to securely shut the door on the front of the stove to keep the fire contained.  You will need to adjust your grate so that the fire will die down a little as a fire that is burning too hot can damage the stove.

Fuel is wood, and there are many aspects you will want to keep in mind as you are choosing the type of wood you want to use for your wood fire.  Some woods burn very quickly, and other woods can be a smoke and fire hazard while they are still freshly cut.

Wood burning stoves are great for heating a home, and they can be handy during a power outage during colder weather.  They also add an interesting decor element to any home.  Wood stoves come in different sizes and styles now, while the stoves haven't changed all that much since their invention, they have been made safer and more aesthetically pleasing since days gone by.

Friday, January 21, 2011

Your Kerosene Heater Wick

There are many things that you need to know about kerosene heaters wicks.  Some of which will help the life of your wick and really just some need to know information about safety,

To clean burn a kerosene heater, take the heater to a well ventilated place.  Outside the house is best, but a garage with no flammable materials will work as well.  Turn the heater on and allow it to run completely out of fuel.  After the heater cools, brush any remaining carbon deposits from the wick.  If you have a fiber-glass wick it will feel softer after this process. You only want to do this with a fiber-glass wick NOT a cotton wick.

To maintain a top operating cotton wick. Roll your wick up so that you can see the top of it clearly and remove any uneven or brittle ends carefully with a pair of scissors.  This only works for cotton wicks, NOT fiber-glass wicks.

It is recommend by the American Lung Association, US Environmental Protection Agency and the US Consumer Product Safety Commission the you change your wick yearly. If it is used frequently, or you are using a low quality of kerosene, you may need to change your wick more often.
We do recommend that you keep the instructions to your heater and follow the instructions.  The correct wick type will be listed in the manual.

There is information on your heater to help you find the wick that you need, but you need to know the brand.  Lots of heaters have the model as a name not number.  For example, you may have the Aladdin Temprite 15, the brand is Aladdin and the model is Temprite 15 or you may have an Aloha and you would need the serial number or lot number which you would find on a plate that is riveted to the side or back of the heater. It may look something like 423900.JY747S and your model number would be JY747S.  The reason you need this information is because there are many different sizes, lengths, with cut outs, with pins and some are the whole unit or only the top that burns.

Here are some basic reasons you would want to change you heater wick:
  • if you purchased a used heater
  • if it has been more then a year since you last used it
  • if you are having problems getting it to burn
If you are having problems with it not wanting to burn I would start with getting rid of the fuel that you are using.  Kerosene does have a tendency of going bad and tends to collect moisture. As a reminder to everyone, if you are going keep you kerosene in a red or blue gas container it is always smart to take a sharpie and write, “K-1” on the side so you never mix the contents of the container.

If you need to purchase wicks for Kerosene Heaters visit http://woodstove-outlet.com

Monday, January 17, 2011

How do you know what size Wood Stove you need?

When it comes to heating your home you want to be sure that you purchase the appropriate heating system for your home.  When you look at the description for a wood stove you will see that it heats in BTUs.   

A BTU is a British Thermal Unit.  This is a measure of how much heat the stove puts out.   

Sometimes you see the measurement in kW or Kilowatts.   

The output you require is dependent on the size of the room to be heated.  To determine the cubic meters of the space to be heated you will need to use a metric ruler and measure the length, width, and height of the room you wish to heat (in meters). Multiply the three measurements. The number you get is your cubic meters.  

Once you have that measurement you have the cubic meters of the room.  To heat a 25 cubic meter space it takes approximately 1kW if the room is well insulated.  If it is not then 1kW will heat a 15 cubic meter average insulated room, of a 10 cubic meter poorly insulated room.

When you have the initial measurements you multiply them all together and divide by the insulation figures listed above.  Here is an example:

If the room is 6 meters wide, 7 meters long, and 3 meters tall your cubic meter space is 126.  Let’s assume the room is insulated fairly well, but not excellent meaning it falls in the average category.  We’ll now take 126 and divide it by 15 cubic meters.  This means it will take approximately 8.4 kW to heat that room. 

Now as we have already mentioned the units may be given in BTUs for the stove you’re looking at.  To convert kW to BTU you’ll need this conversion:

1 kW or kWh (same thing) = 3412.3 BTU/hr

So to convert this example to BTUs then take 8.4 kW and multiply it by 3412.3 BTUs and you’ll get 28,681.17 BTUs/hr.

But to help you out a little most of the wood stoves we have listed on Wood Stove Outlet also have the square footage that the stove can heat listed as well.  So if you know the square footage of your home, that may help you, but as far as ceiling heights, and taking insulation conditions into consideration, BTUs are really the best measurement you can do to determine appropriate stove size. 

None of this really matters though if you have a room that has a lot of windows, drafty doorways, etc.  Weather proofing your home and adding more insulation will help you keep heat in your home.

If you are buying a wood stove more for decorative purposes rather than for the heat, make sure you do not buy a stove that will put out too much heat.  If you are running that stove at lower outputs the efficiency will be poor, possibly cause flue problems including condensation and reduced visual appeal due to smaller flames and under performing air-wash.  You are better to have a stove that has slightly less output than you require so that the stove is working hard all the time, resulting in more flames and cleaner glass.

Before buying and installing any wood burning stoves you should have your chimney and flue inspected by a trained, certified chimney sweep.  Your chimney may have a low integrity that prevents you from safely burning a fire in that stove.  Also call your insurance company and talk to them about adding that a wood burning stove or fireplace to your home owner’s insurance policy. If you decide to invest in a wood stove then you will want to be sure to properly maintain and upkeep the stove.

Wednesday, January 12, 2011

Decorative Fireplaces, What to do with them...

There are many people who have purchased a home or are renting an apartment that has a fireplace in it, that once upon a time was working, but is now only there for decorative purposes. But before you get started decorating, you might want to use a fireplace hand brush to clean all the soot off of it from the days when it was once in use. So here are 5 ideas that we have come up with for your decorative fireplace:

1. Tried and True.  Many people have used candles in their decorative fireplaces.  And this is a great idea, and there are many candle racks, or candelabras made for fireplaces.

2.  Make it look real.  Many people will still put firewood in their decorative fireplaces to give it a feeling that it could be used, just be sure to keep people from trying to light it.

3. Storage.  Some people use them as a place to store things if the fireplace is deep enough.  Want to hide the clutter that is hiding in your fireplace, use a decorative fireplace screen.

4. Bookcase.  If the seal is tight enough that no water ever leaks in, you could add some shelves into your nonworking fireplace and create a neat built in bookcase.

5. Potted Plants.  Some people keep a potted fern, or other plant that needs limited sunlight in their decorative fireplace.  This adds a bit of greenery to an otherwise dark space.

Let us know if you try any of these ideas.  We'd love to see some photos, or your blogs about what you did with your decorative fireplace. Also feel free to check out some fireplace myths.

Friday, January 7, 2011

Benefits of Woodstoves

Many people are frustrated with how high their electricity bill can get in the winter.  And as cold as it has been lately, (and with all of the snow we've had, especially here in SW Virginia) its easy to see what the cause of this increase in spending on electricity is.  Wood stoves are a great alternative to using electrical, oil, or propane heat.  Not only can they help lower your power bill, but they are also a great back up plan for your heating when/if your power fails.

With wood, it is typically cheaper and easier to purchase vs. Oil or propane.  It is also a renewable resource.  Which is always a good thing.  And depending on the type of wood you are burning, it can burn at a much slower rate than oil or propane does.  And as for decor, woodstoves can add a unique old world feel to the room that they are in.

But before you make the purchase of a wood stove you will want to see if there are any local building regulations regarding wood heating in your city or county, you will also want to figure out what size wood stove you will need.  Safety is always a first!


View our Squidoo Lens on The Benefits of Woodstoves.

Tuesday, January 4, 2011

Nostalgic Cooking

For many of us with wood stoves, it is easy to forget that if we have the right type of wood stove, that they can be cooked on. Although, I always remember right when the power goes out and after enough times of that I decided to go ahead and invest in some great Cast Iron Cookware by Lodge Logic.  But, you don't have to wait until the power goes out to use your wood stove for cooking.  My grandmother made some of the best dishes cooking on her wood stove, and using my to cook with always makes me think of her.


Breakfast is my favorite to cook.  It's quick, simple, and seems to taste so much better.  There are tons of websites with recipes for cast iron cookware Lodge Logic offers some recipes on their website, but the possibilities don't stop there.  We'd love to hear what you've been cooking on your wood stove this winter!

Be sure to keep your wood stove in top shape by taking the steps to maintain and upkeep your woodstove.

Monday, January 3, 2011

Woodstove Outlet

Hello and welcome to our first blog.  We are Woodstove Outlet, and things are in full swing for the New Year already.  We cannot believe that 2010 went by so quickly.  We are owned and operated by Red Hill General Store which has a brick and mortar location in Hillsville, VA.  You should stop by and see us there if you live close enough we are located just outside the town limits of Hillsville, at 1035 Sylvatus Hwy. (Rt. 100)
 
In our online store and at Red Hill General Store we offer Woodstoves and accessories, Fireplace accessories, Stovepipe, Kerosene heater wicks, Chimney accessories, and more!  So feel free to check out all our links, leave comments/suggestions, bookmark us, etc.  We love to interact with our customers and readers!  Feedback is always a plus!

To get you started feel free to read:

How to Change a Kerosene Heater Wick
Woodstoves - History
3 Fireplace Myths
Related Posts Plugin for WordPress, Blogger...